Collect Data with Android
This guide will show you how to collect data in an Android application without touching the data. In this example, we will be collecting credit card numbers.
Key concepts in this guide:
Getting Started
To get started, you will need a Basis Theory account.
Next you will need a Public Application in order to use Android Elements for your application.
Click here to create a Public Application or login to your Basis Theory account and create a new application with the following settings:
- Name - Collect Data from Android Guide
- Application Type - Public
- Permissions -
token:create
Set Up the Project
We will create a new Android application through Android Studio. If you don't have Android Studio, download it here.
-
Launch Android Studio, then click
New Project. On thePhone and Tablettab selectEmpty Activityand clickNext. -
For the
Nameenter "Android Collect Guide", and for thePackage nameuse your organization's name. Leave the remaining settings as is and clickFinish.
This will launch Android Studio with the newly created project. Wait a bit for it to set up and Gradle sync to finish.
Install the Android Elements SDK
We will need to install Basis Theory's Android Elements SDK, which will be used to render a View for securely capturing the data.
In the settings.gradle file add this repository:
  repositories {
      maven { url 'https://jitpack.io' }
  }
Then in the build.gradle add this dependency specifying the correct version:
  dependencies {
      implementation 'com.github.basis-theory:basistheory-android:<version>'
  }
Add Your Form Elements
Now we need to add the CardNumberElement component to our application.
To do so, open the res/layout/activity_main.xml file and add the following code:
<?xml version="1.0" encoding="utf-8"?>
<androidx.constraintlayout.widget.ConstraintLayout xmlns:android="http://schemas.android.com/apk/res/android"
    xmlns:app="http://schemas.android.com/apk/res-auto"
    xmlns:tools="http://schemas.android.com/tools"
    android:layout_width="match_parent"
    android:layout_height="match_parent"
    tools:context=".MainActivity">

    <LinearLayout
        android:layout_width="match_parent"
        android:layout_height="wrap_content"
        android:layout_margin="20dp"
        android:orientation="vertical"
        app:layout_constraintEnd_toEndOf="parent"
        app:layout_constraintStart_toStartOf="parent"
        app:layout_constraintTop_toTopOf="parent">

        <com.basistheory.android.view.CardNumberElement
            android:id="@+id/card_number"
            android:layout_width="match_parent"
            android:layout_height="wrap_content" />

        <Button
            android:id="@+id/tokenize_button"
            android:layout_width="wrap_content"
            android:layout_height="wrap_content"
            android:layout_marginTop="20dp"
            android:backgroundTint="#00A4BA"
            android:text="Tokenize" />
    </LinearLayout>

</androidx.constraintlayout.widget.ConstraintLayout>
This adds a LinearLayout which contains the card number element and a button used to tokenize the card number.
Style Your Form Elements
Now it's time to style our new CardNumberElement. We'll be styling our element programmatically, but you can also style it through the activity's XML or the GUI on Android Studio.
Open your main activity class file which should be called MainActivity.kt. Now we need to declare and initialize a variable to reference the card number element we defined on the layout.
class MainActivity : AppCompatActivity() {

    private lateinit var cardNumberElement: CardNumberElement

    override fun onCreate(savedInstanceState: Bundle?) {
        super.onCreate(savedInstanceState)
        setContentView(R.layout.activity_main)

        cardNumberElement = findViewById(R.id.card_number)
    }
}
With the card number element reference declared, we can now style it with the following code:
class MainActivity : AppCompatActivity() {

    private lateinit var cardNumberElement: CardNumberElement

    override fun onCreate(savedInstanceState: Bundle?) {
        super.onCreate(savedInstanceState)
        setContentView(R.layout.activity_main)

        cardNumberElement = findViewById(R.id.card_number)

        cardNumberElement.setPadding(5, 5, 5, 5)
        cardNumberElement.hint = "Placeholder"
        cardNumberElement.textColor = Color.WHITE
        cardNumberElement.background = Color.LTGRAY.toDrawable()
    }
}
Tokenize the Card Number
We want to be able to tokenize the value within the CardNumberElement without exposing it to our Android application.
Just like we did with the card number element, let's declare and initialize a variable to reference the button we added to our layout in the Add Your Form Elements step.
class MainActivity : AppCompatActivity() {

    private lateinit var cardNumberElement: CardNumberElement
    private lateinit var button: Button

    private val bt = BasisTheoryElements.builder()
        .apiKey("<PUBLIC_API_KEY>")
        .environment(Environment.TEST)
        .build()

    override fun onCreate(savedInstanceState: Bundle?) {
        super.onCreate(savedInstanceState)
        setContentView(R.layout.activity_main)

        cardNumberElement = findViewById(R.id.card_number)
        button = findViewById(R.id.tokenize_button)

        cardNumberElement.setPadding(5, 5, 5, 5)
        cardNumberElement.hint = "Placeholder"
        cardNumberElement.textColor = Color.WHITE
        cardNumberElement.background = Color.LTGRAY.toDrawable()
    }
}
Now let's add a listener to tokenize the value once the button is clicked.
We first need an instance of BasisTheoryElements to be able to interact with the Basis Theory API. Then we can call the
tokenize function on this service to tokenize the card number as shown below:
class MainActivity : AppCompatActivity() {

    private lateinit var cardNumberElement: CardNumberElement
    private lateinit var button: Button

    private val bt = BasisTheoryElements.builder()
        .apiKey("<API_KEY>")
        .environment(Environment.TEST)
        .build()

    override fun onCreate(savedInstanceState: Bundle?) {
        super.onCreate(savedInstanceState)
        setContentView(R.layout.activity_main)

        cardNumberElement = findViewById(R.id.card_number)
        button = findViewById(R.id.tokenize_button)

        cardNumberElement.setPadding(5, 5, 5, 5)
        cardNumberElement.hint = "Placeholder"
        cardNumberElement.textColor = Color.WHITE
        cardNumberElement.background = Color.LTGRAY.toDrawable()

        button.setOnClickListener {
            tokenize()
        }
    }

    private fun tokenize() {
        val tokenizeResponse = runBlocking {
            bt.tokenize(object {
                val type = "card_number"
                val data = cardNumberElement
            })
        }

        println(tokenizeResponse)
    }
}
<API_KEY> with the Public API Key you created in the Getting Started step.🎉 The code above is the last bit that we need to tokenize! Now let's run the application by clicking on the play button on the top right. The screen should look something like this:
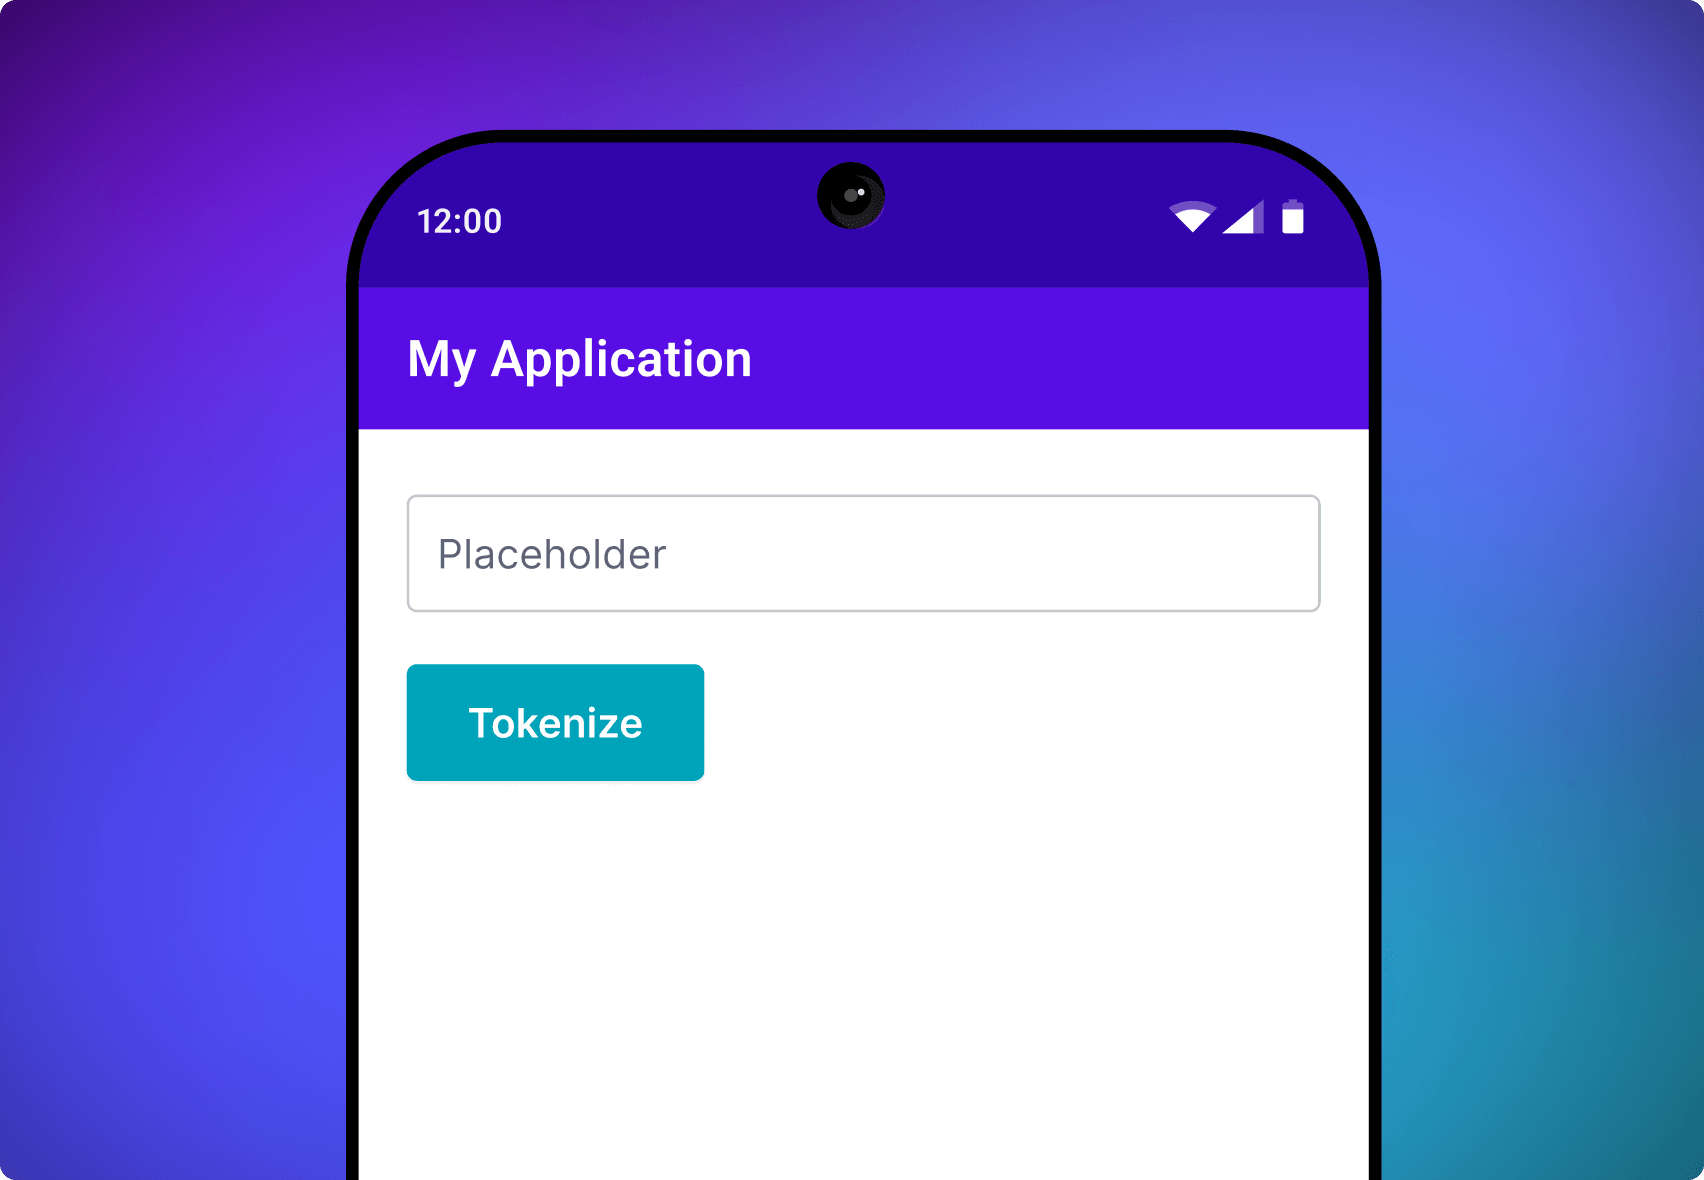
Conclusion
You can now capture any data without your Android application accessing the underlying value, drastically reducing compliance and regulatory scope.
Try typing in a card number in the CardNumberElement and tap on Tokenize. Basis Theory's Android SDK will pass the value for the element reference. This will
be securely submitted directly to the Tokenize Endpoint. The resulting token is printed to the Android Studio console.
Learn More
A full example Android application is included within the example module within the GitHub repository or explore all the supported Element Types.