Extract Cards
This guide is designed to help you understand how you can extract sensitive information out of images by leveraging Basis Theory secure environment to perform OCR.
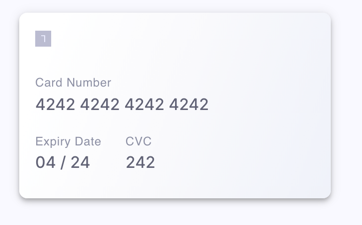
The image to be used purposely has poor quality and uneven trim:
Key concepts in this guide:
Getting Started
To get started, you will need a Basis Theory account.
Next you will need a Management Application in order to provision the components in this guide.
Click here to create a Management Application or login to your Basis Theory account and create a new application from the Full Management Access template.
Create a Private Application
We need a Private Application to create tokens and invoke our reactor:
curl "https://api.basistheory.com/applications" \
  -H "BT-API-KEY: <API_KEY>" \
  -H "Content-Type: application/json" \
  -X "POST" \
  -d '{
    "name": "Extract Data App",
    "type": "private",
    "permissions": [
      "token:create",
      "token:use"
    ]
  }'
<API_KEY> with the Management API Key you created in the Getting Started step.Create a Reactor
Reactors provide a secure Node.js 16 runtime environment to be able to execute custom code.
First, let's write a function that takes in an image URL and invokes Tesseract.js to extract text:
const { createWorker } = require("tesseract.js");

module.exports = async function (req) {
  const {
    bt,
    args: { url },
  } = req;
  let worker;

  try {
    worker = await createWorker();
    await worker.loadLanguage("eng");
    await worker.initialize("eng");
    const {
      data: { text },
    } = await worker.recognize(url);

    return {
      raw: {},
    };
  } catch (error) {
    return {
      raw: {
        error,
      },
    };
  } finally {
    await worker?.terminate();
  }
};
Now, let's run text through a Regex to parse all the numeric values and invoke Create Token via SDK method to tokenize the extracted data:
const { createWorker } = require("tesseract.js");

module.exports = async function (req) {
  const {
    bt,
    args: { url },
  } = req;
  let worker;

  try {
    worker = await createWorker();
    await worker.loadLanguage("eng");
    await worker.initialize("eng");
    const {
      data: { text },
    } = await worker.recognize(url);

    const cardData = [...text.matchAll(/\d+/g)].map((match) => match[0]).reverse();
    const [cvc, expiration_year, expiration_month, ...numberArr] = cardData;
    const number = numberArr.join("");

    const token = await bt.tokens.create({
      type: "card",
      data: {
        number,
        expiration_month,
        expiration_year: `20${expiration_year}`,
        cvc,
      },
    });

    return {
      raw: {
        token,
      },
    };
  } catch (error) {
    return {
      raw: {
        error,
      },
    };
  } finally {
    await worker?.terminate();
  }
};
Let's store the JavaScript code as a variable. In your terminal, run the following:
javascript=$(cat code.js)
Now, let's create a Reactor:
curl "https://api.basistheory.com/reactors" \
  -H "BT-API-KEY: <API_KEY>" \
  -H "Content-Type: application/json" \
  -X "POST" \
  -d '{
    "name": "Card OCR Reactor",
    "application": {
      "id": "db29a0ec-0cc2-41ec-a8c7-ba78b9b40c90"
    },
    "code": '"$(echo $javascript | jq -Rsa .)"',
  }'
<API_KEY> with the Management API Key you created in the Getting Started.<API_KEY>with the Management API Key you created in the Getting Started step;db29a0ec-0cc2-41ec-a8c7-ba78b9b40c90with theidof the Private Application you created in the Create a Private Application step.
id from the response as it will be used to invoke the reactor.Invoke the Reactor
Finally, we can invoke our reactor with the tokens we previously created. To do this, we will leverage Expressions to detokenize the request before passing the data directly into our code:
curl "https://api.basistheory.com/reactors/5b493235-6917-4307-906a-2cd6f1a90b13/react" \
  -H "BT-API-KEY: <API_KEY>" \
  -H "Content-Type: application/json" \
  -X "POST" \
  -d '{
    "args": {
      "url": "https://developers.basistheory.com/img/guides/process/card.png"
    }
  }'
<API_KEY>with the Private API Key you created in the Create a Private Application step5b493235-6917-4307-906a-2cd6f1a90b13with the Reactoridyou created in the Create a Reactor step- Token identifiers in the expressions with the tokens you created in the Create Tokens step
You should see the following JSON response:
{
  "raw": {
    "token": {
      "id": "270675da-2ee9-4546-a496-655cfe912126",
      "type": "card",
      "tenantId": "cdbcaf0c-e5e8-4e3d-9152-796a5eeac03a",
      "data": {
        "number": "XXXXXXXXXXXX4242",
        "expiration_month": "04",
        "expiration_year": "2024"
      },
      "createdBy": "db29a0ec-0cc2-41ec-a8c7-ba78b9b40c90",
      "createdAt": "2023-02-20T18:41:05.4010271+00:00",
      "mask": {
        "number": "{{ data.number | reveal_last: 4 }}",
        "expirationMonth": "{{ data.expiration_month }}",
        "expirationYear": "{{ data.expiration_year }}"
      },
      "searchIndexes": [],
      "containers": ["/pci/high/"]
    }
  }
}
Conclusion
We were able to securely extract sensitive data from an image without directly touching the information, therefore reducing our risk and security scope.
With a tokenized version of the credit card, we can now send it for processing, render it securely and in a customized manner in our own UI, and much more.